Panels 24 Connections in Series 12s2p
Solar Panels 24 x 580W
Step-by-Step Connection (12S2P)
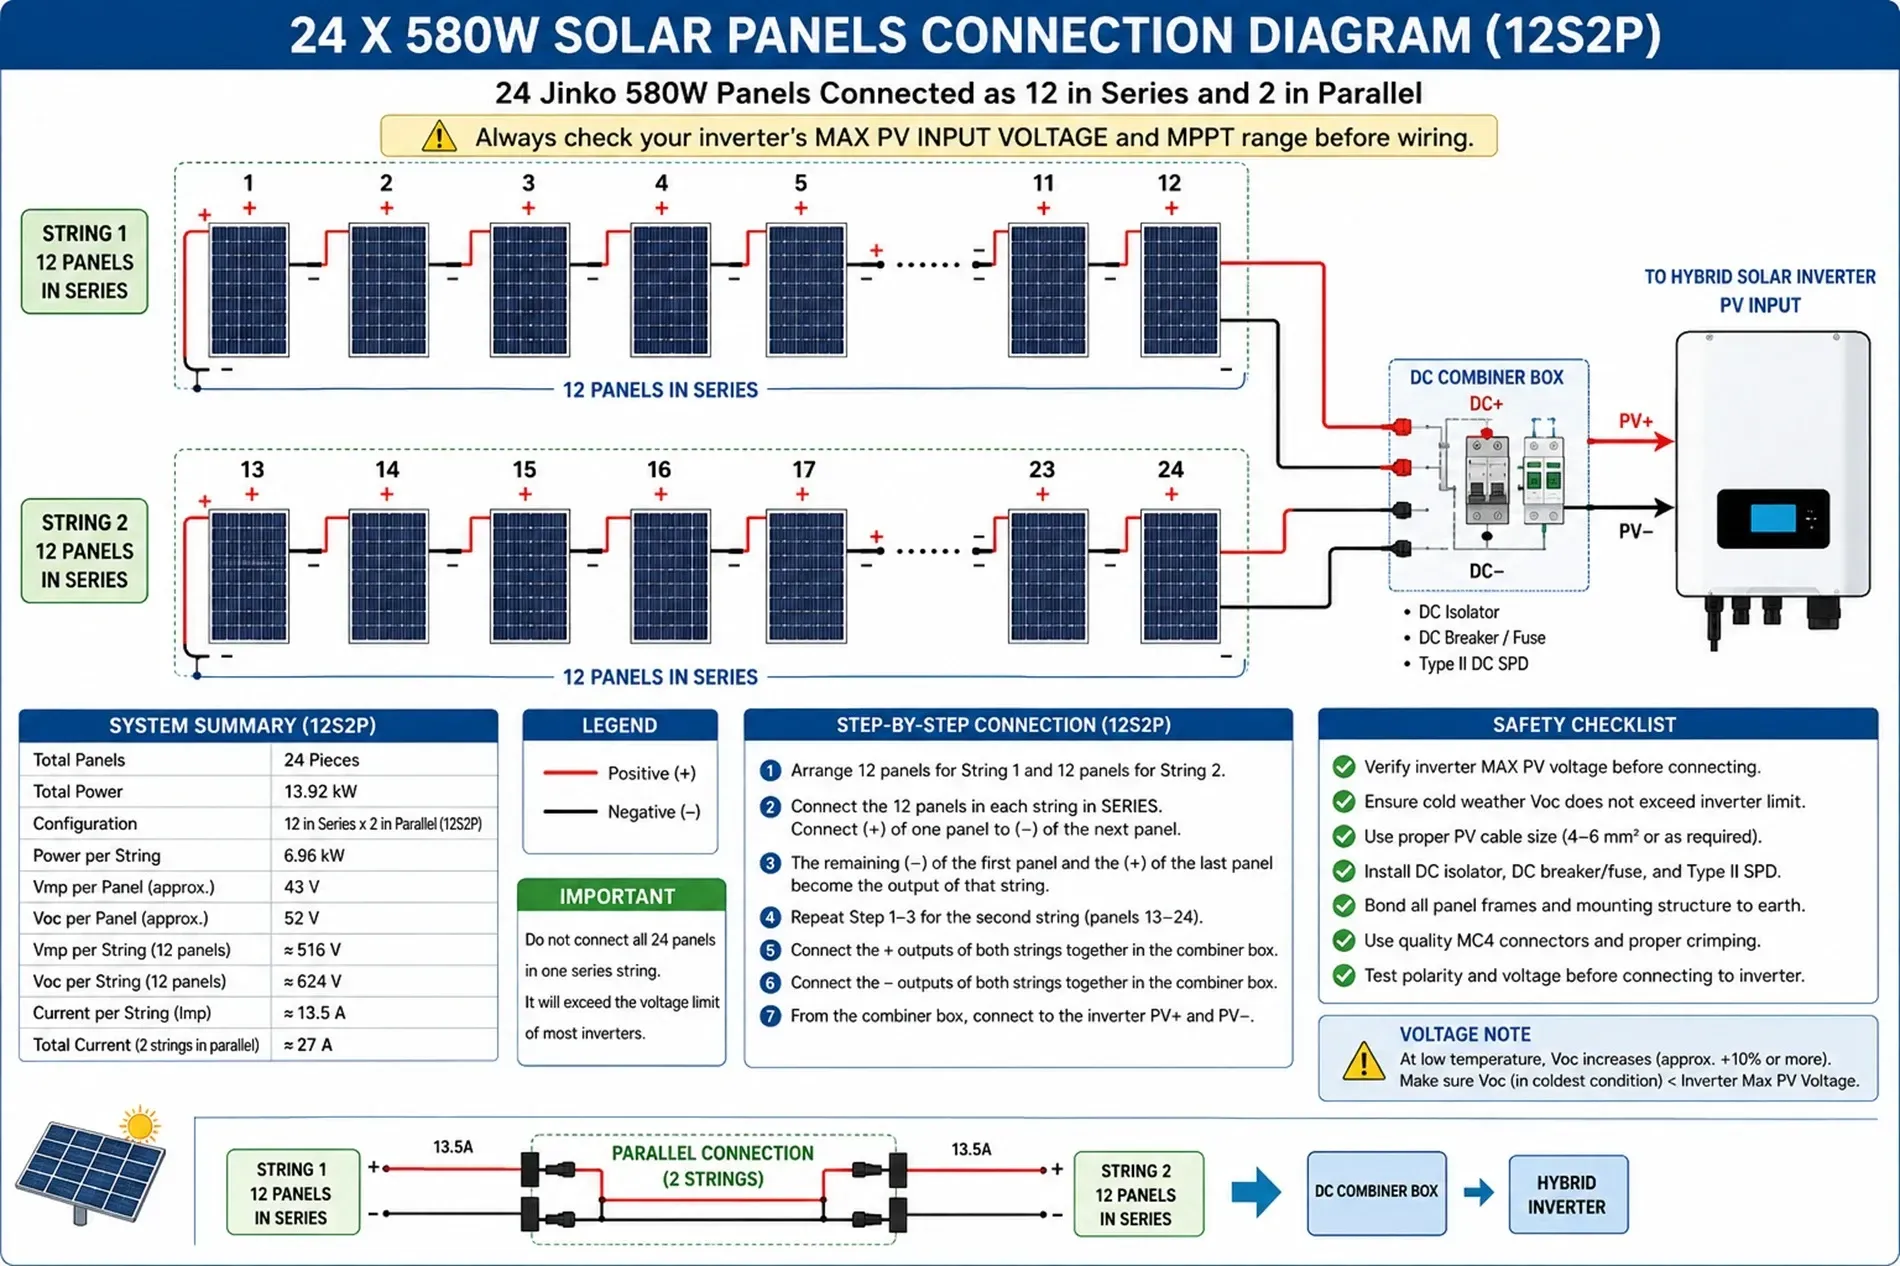
The image shows 24 Jinko 580W solar panels, which gives a total array size of:
- 24 × 580W = 13,920W (13.92 kW)
However, you should not connect all 24 panels in one long series string. Doing so would create a dangerously high DC voltage.
Example panel specifications (typical Jinko 580W)
Always verify the exact values on your panel label.
- Power (Pmax): 580W
- Voltage at Maximum Power (Vmp): ≈ 43V
- Open Circuit Voltage (Voc): ≈ 52V
- Current at Maximum Power (Imp): ≈ 13.5A
Why 24 Panels in One Series Is Unsafe
If all 24 panels are connected in series:
- Vmp = 24 × 43V = 1,032V
- Voc = 24 × 52V = 1,248V
This exceeds the maximum input voltage of most residential and commercial inverters.
Recommended Wiring
The correct wiring depends entirely on your inverter's:
- Maximum PV input voltage
- MPPT voltage range
- Maximum PV input current
- Number of MPPTs
Example 1
Inverter Maximum PV Voltage = 500V
Connect:
String 1
12 Panels in Series
P1 → P2 → P3 → ... → P12
String 2
12 Panels in Series
P13 → P14 → ... → P24
Then connect both strings in parallel into the inverter.
Results:
- Voltage ≈ 516V Vmp
- Current ≈ 27A
Example 2
Inverter Maximum PV Voltage = 600V
Still use
12S2P
or
10S + 10S + 4 panels on another MPPT
depending on inverter design.
Example 3
Commercial 1000V Inverter
Possible:
24 Panels
All Series
Only if the inverter specifically allows:
- 1000V DC
- or 1100V DC input
This is usually commercial equipment—not typical home hybrid inverters.
Step-by-Step Connection (12S2P Example)
Step 1
Arrange the first 12 panels.
P1 P2 P3 P4 P5 P6
P7 P8 P9 P10 P11 P12
Step 2
Connect in series.
P1 (+) → P2 (-)
P2 (+) → P3 (-)
P3 (+) → P4 (-)
Continue...
P11 (+) → P12 (-)
Step 3
The remaining wires become
Negative
P1 (-)
Positive
P12 (+)
These go to the inverter.
Step 4
Repeat for panels 13–24.
P13 (-)
↓
P14
↓
P15
↓
...
↓
P24 (+)
Step 5
Connect both strings in parallel using MC4 Y-connectors or a combiner box.
String 1 (+) --------\
\
+---- Inverter PV+
/
String 2 (+) --------/
String 1 (-) --------\
\
+---- Inverter PV-
/
String 2 (-) --------/
Electrical Values (12S2P)
ItemValuePanels24Power13.92 kWStrings2Panels per string12Vmp≈516VVoc≈624VCurrent≈27ASafety Checklist
- ✓ Verify the inverter's maximum PV voltage before wiring.
- ✓ Ensure the cold-weather Voc does not exceed the inverter limit.
- ✓ Use the correct PV cable size (typically 4–6 mm², or larger if required by current and distance).
- ✓ Install DC isolators and appropriately rated DC breakers/fuses.
- ✓ Install Type II DC surge protection devices (SPDs).
- ✓ Bond all panel frames and mounting rails to the grounding system.
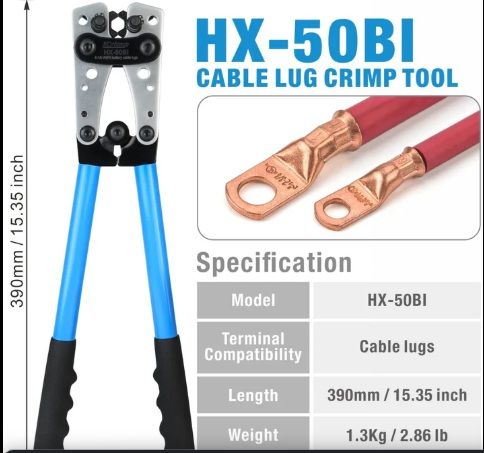
- ✓ Confirm MC4 connectors are compatible and properly crimped.
For your SolarUyo.ng training materials or YouTube content, I can also create:
- a professional color wiring diagram (12S2P),
- a 3D installation illustration, and
- a step-by-step infographic suitable for homeowners and installers.